With ZWTraffic application for ZWCAD you can easily make custom signs for your traffic-related projects
Serving as a vital resource for traffic designers globally, the ZWTraffic addon supports multiple languages and dedicated versions. Today, we're delving into its universal tools, including sign and board generators, which allows you to craft your own detour signs, signposts, or pre-roundabout markings with ease.
Creating diversions signs
Diversions boards, depending on the country, situation, and regulations, can vary significantly in appearance. With the ZWTraffic addon, the Traveling boards panel in ZWCAD becomes a powerhouse for creating customizable road signs.
To begin with, let's take a look at the dedicated panel.
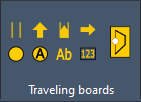
These functions are designed to either draw or transform objects into the necessary signs. The last function, in particular, combines the selected elements into a cohesive sign by encasing them with a suitable frame and converting them into a block.
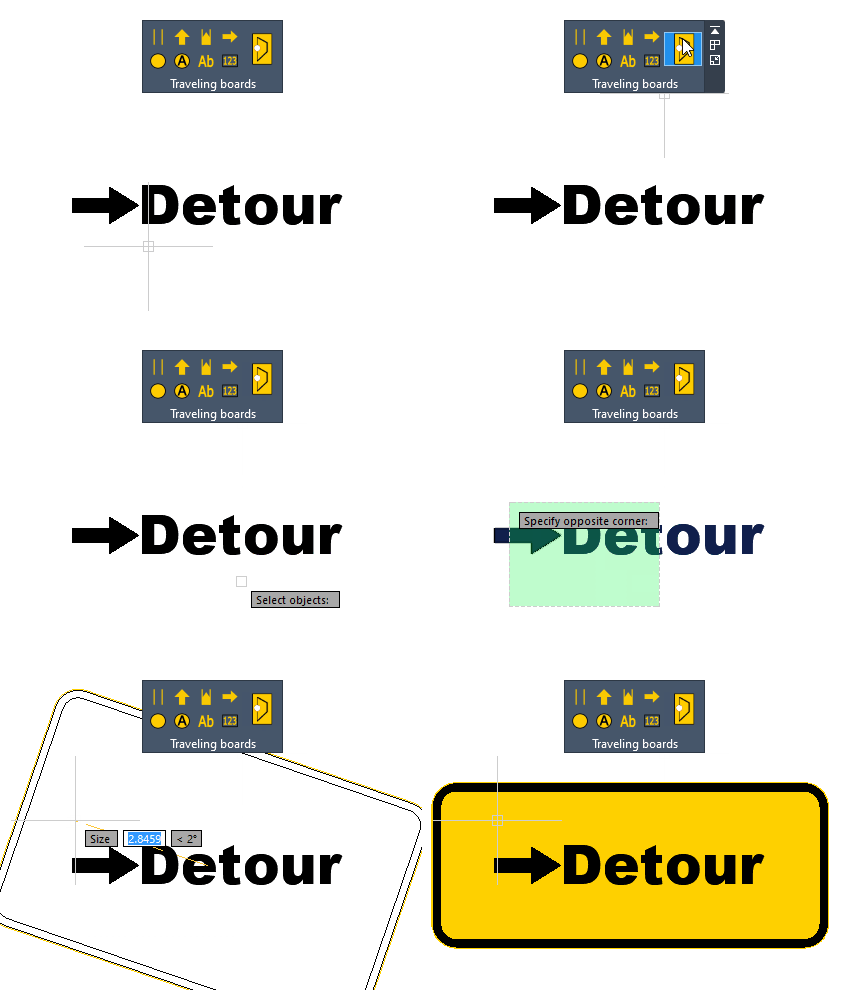
Let's look at the example of a simple arrow with detour information.

I utilized the Arrow function to insert the arrow and the Description of the road feature to place the caption adjacent to it. Subsequently, I modified the caption to switch the font to one that was more appropriate, enhancing the clarity and effectiveness of the sign.
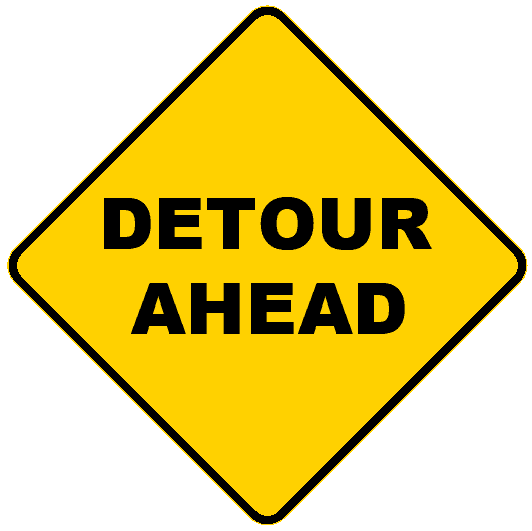
In the same way, we can also make a similar sign like this:
What if we had more complicated signs?
Now, let's explore other functionalities of the ZWTraffic addon to craft a comprehensive sign with detour information for our CAD drawing, demonstrating the addon's capability to handle complex road signs.
To begin, I'll prepare the basic structure. I'll start by drawing two polylines that will serve as the foundation for the transformation, employing the Closed road and Road of detour functions.
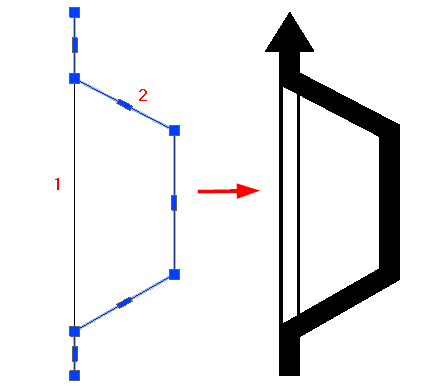
Utilizing these two commands, I can press D for Draw, as reminded in the command line, allowing me to draw objects directly. This method proves to be more convenient for me, streamlining the design process.
Next, I'll use the City description to label the towns involved in the diversions and the Description of the road to detail the destination of these diversions.
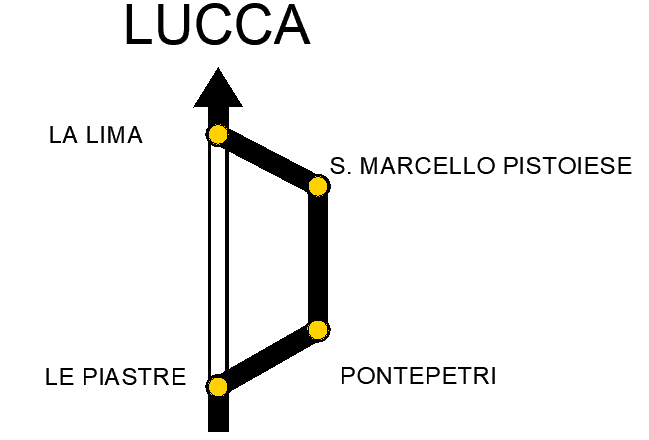
Before finalizing the design, I'll use another feature introduced by ZWTraffic in ZWCAD to incorporate a sign. The function will be the sign library, a basic tool for inserting vertical signs. You can explore this essential tool and vertical signs, along with our sign database, in our other article.
So I select the weight limit sign and insert it as a block.
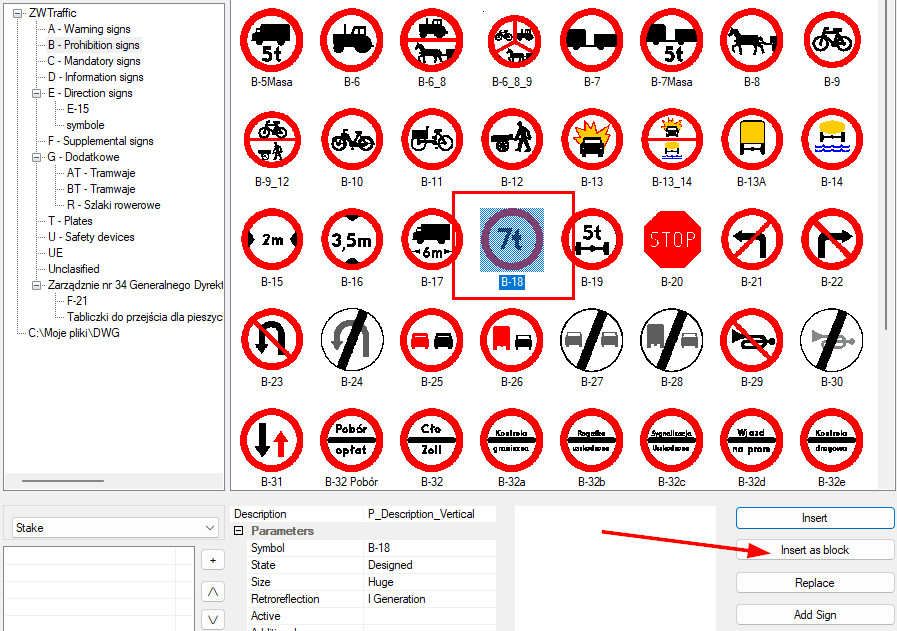
In the ZWCAD drawing, I still had to enter a weight constraint, select the scale, rotation, and insertion point. Optionally, I could edit the font by double-clicking.
After the sign had been inserted, I used the last command to enclose the whole thing in a frame, et voilà.
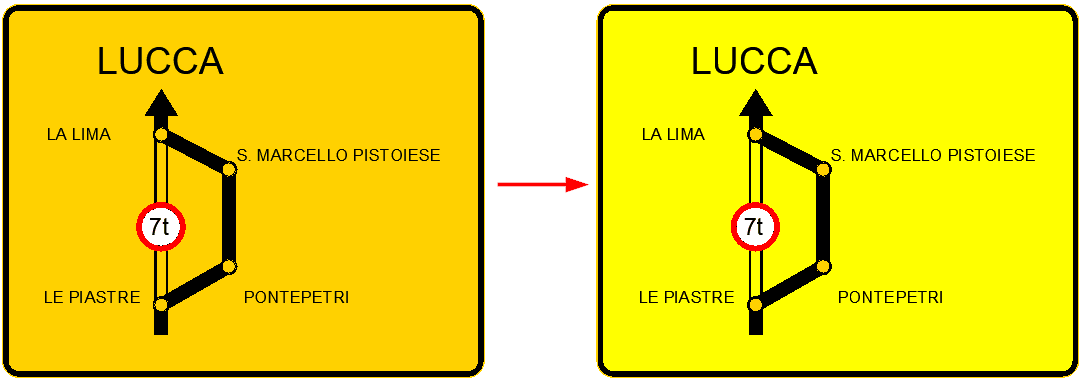
The finished board is on the left. The rules and regulations in various circumstances and countries are different, so you can easily change the background colour if necessary by editing the block and changing the hatch colour.
Creating information boards in front of a roundabout
For the next example, I recommend choosing a dark background colour for our 2D CAD programme so that all elements are visible and legible. We'll now look at creating an exit sign for the roundabout.
We'll need this tab on the ribbon:

I started with the Roundabout function to insert the roundabout outline into the CAD drawing, a crucial step in road design. In the command line, I could choose its size, but I stayed with the default. I then used the commands next to draw the access and exits. I selected the inner circle and indicated the direction. Once again, the command line prompted me for the size. The length of the exits defaults to the length of the roundabout entrance.
I then fill in the roundabout.
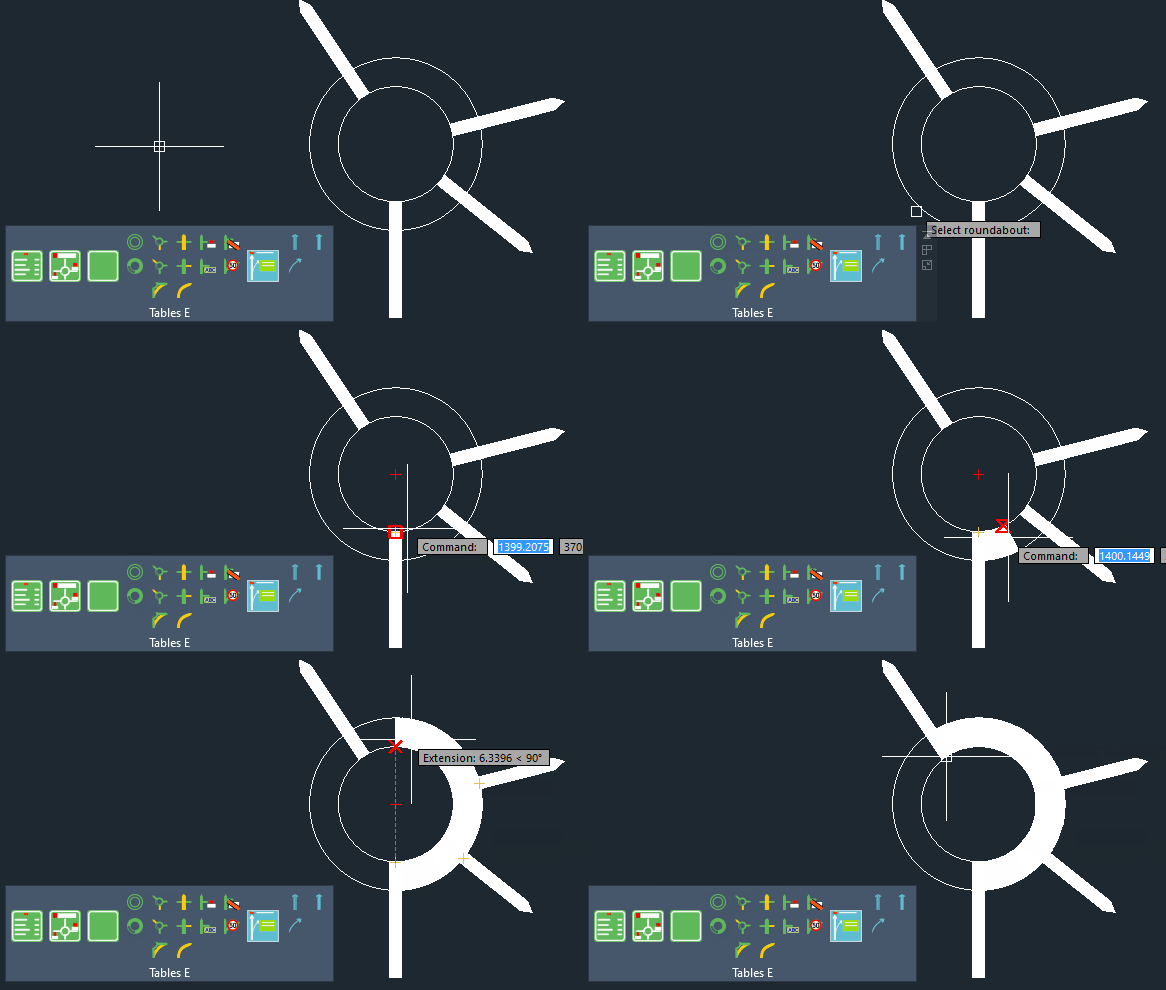
It's a simple function. I re-selected the inside of the roundabout and marked the start and end points. The infill was added.
In this panel, we have a few more options to add, like signs, road closures, junctions, or motorway exits, enhancing our road signs capabilities. I used the option to insert signs and described my possible exits. I then used the function of surrounding the sign with a frame; in this case, the background is green.
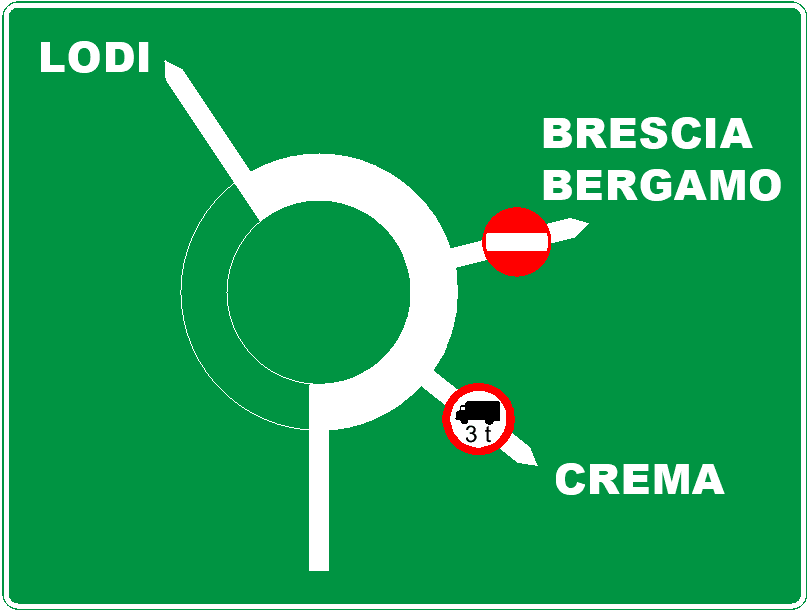
Of course, by editing this ZWCAD element, we can change the background of our block or any of its other elements, making it customizable to fit our needs.
In this panel, we also have the option to insert ready-made templates or save our own.
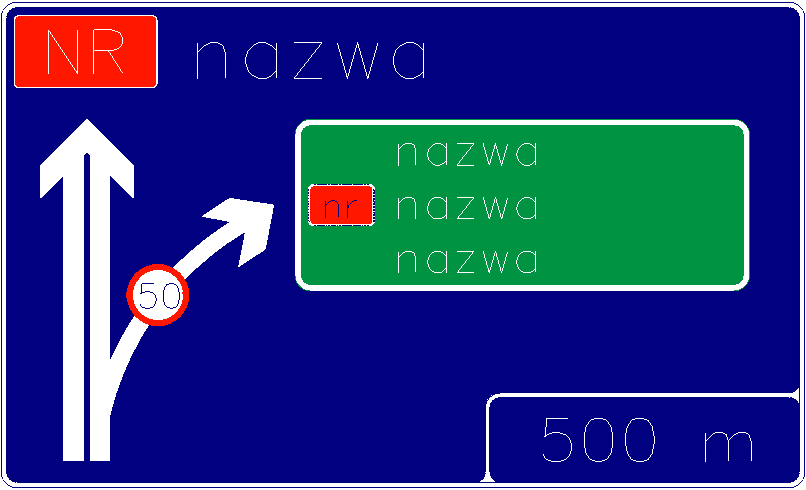
This is what an example of a motorway exit template available in the ZWTraffic addon looks like.
Let's have a look at the generators of directional signs
ZWCAD has been further enhanced with the Direction marking function. It makes it possible to create a collective board of directions to various cities and towns.
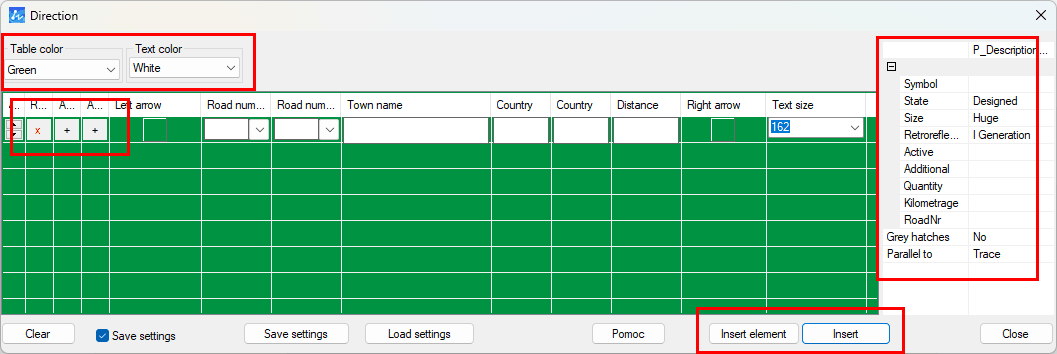
This tool is highly customizable, offering a number of options for preparing your own board. In the left corner, you can select the colour of the table and the text. Below, you can add or remove rows in the road board you are creating, which include information such as road number, direction, road type, town name, distance, or size.
On the right side, there are general settings, e.g., condition, size, angle of rotation, and some additional statistics that are useful when creating statements and tables, such as kilometrage.
There are two insertion methods below. Insert element places a block into the CAD drawing with the selected parameters, while Insert places a sign together with all associated elements, showcasing the versatility of 2D CAD design.
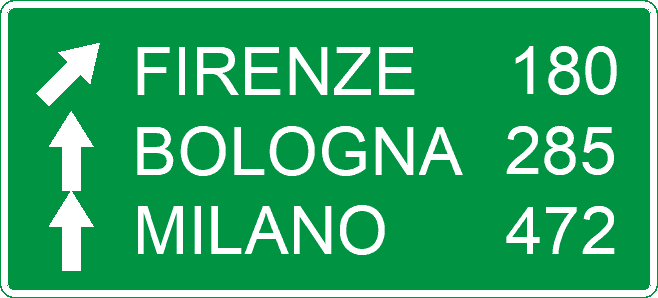
This is what a sample sign created by this ZWTraffic generator looks like.
We can also use commands from ZWCAD itself or other ZWTraffic panels to prepare the appearance of the array for ourselves, then use the merge functions to merge it into one, leveraging the full capabilities of ZWCAD.

I used the Direction marking function to create the road markings, added a simple arrow, and descriptions of the cities. Finally, I used the tool to merge everything into a sign block and only edited its colour to match, showcasing the practical application of road marking.
To sum up
ZWTraffic is a tool that certainly facilitates the work of road engineers and designers. It allows the quick and precise creation of directional signs that are not only functional but also aesthetically pleasing. Thanks to its intuitive interface and customizable features, the user can customise each element of the board, making work more efficient. This ZWCAD traffic addon is a boon for road design.
Not to forget the numerous templates and ready-made signs available in ZWTraffic, a versatile zwcad traffic addon. These are extremely useful for those looking for quick solutions without having to start from scratch. These templates are customizable, giving you a lot of flexibility in your design.
You can read more about the basic addon settings and vertical signs here. You are welcome to test the ZWTraffic application for ZWCAD 2025 for 30 days in full functionality, exploring its 2D CAD capabilities.

