As a practical exercise, we’ll use our ZWCAD addon to draw The Magic Roundabout in Swindon
The ZWTraffic addon is designed to help with the design of any traffic related CAD project. Besides its extensive library of signs, it has a wide range of features to help you draw any road elements. In this article, we’ll mainly look at horizontal signs and create parking spaces with a few clicks.
The ZWTraffic addon requires ZWCAD Professional to function correctly.
Project preparation
To begin with, let me say a few words about my preparation for this task.
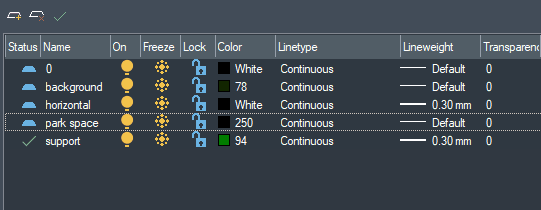
I’ve created the appropriate layers that I’ll need for the various activities. I also distinguished them by colour to make them easy to find in the drawing.
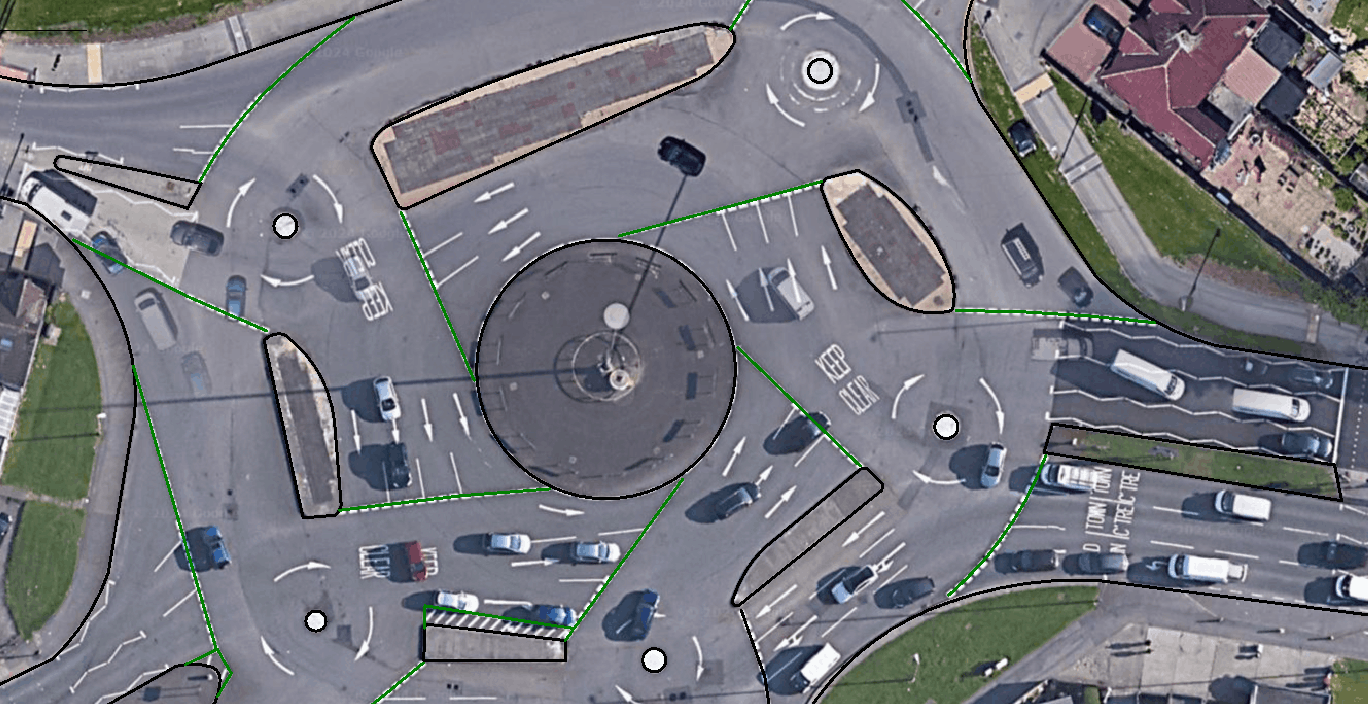
For this, I placed the Magic Roundabout raster on the background layer, which I outlined with basic features such as polylines and circles.
This is how the whole of the current drawing looks after turning off the background layer:
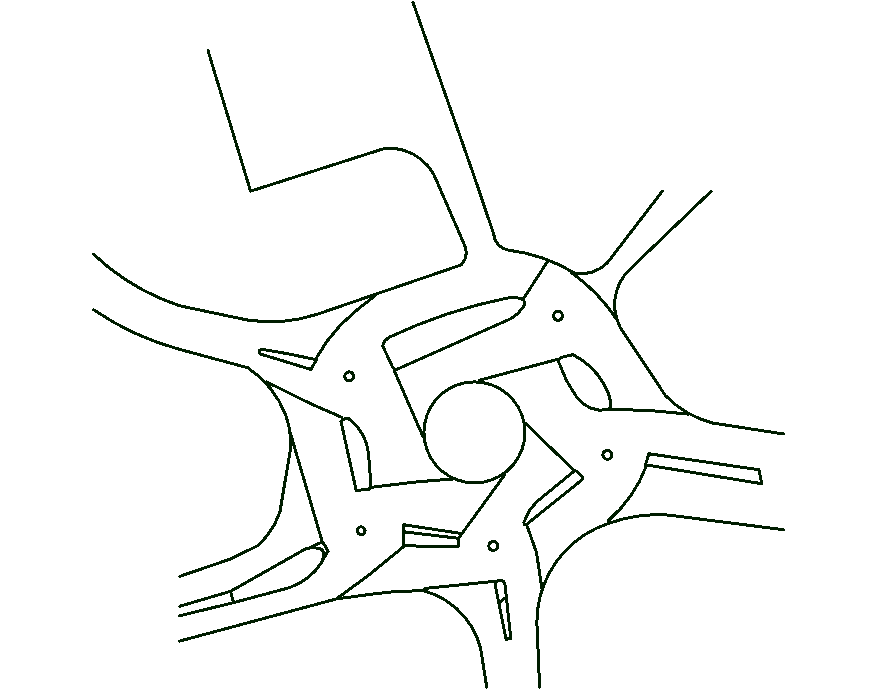
I've marked with green lines the lines that I’ll use to transform with the ZWTraffic tools, but they aren’t necessary. The addon also offers options for drawing them.
The objects we insert will often be inserted in groups; we can turn this off in the options, or we can use Select singly from the extras menu to turn off grouping. This is useful when we do not want to use the state of the signs or when we want to move and edit them more conveniently.

Lane arrows
Let's start with the horizontal arrows, which we will insert in several places on the street.
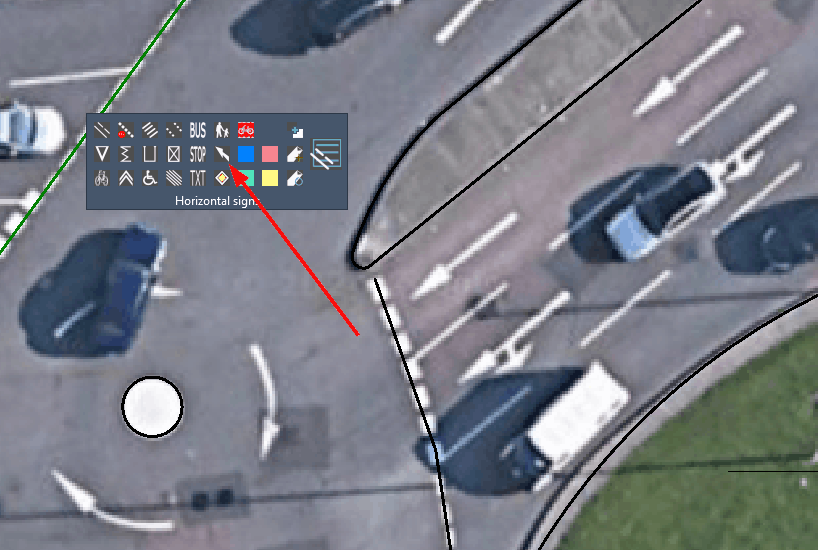
This command will open a menu of arrows that we can conveniently place in the drawing.
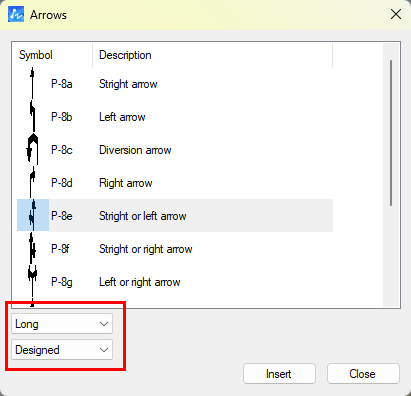
We can also select the size and state of the sign. We then click Insert and place the object we need according to the underlay.
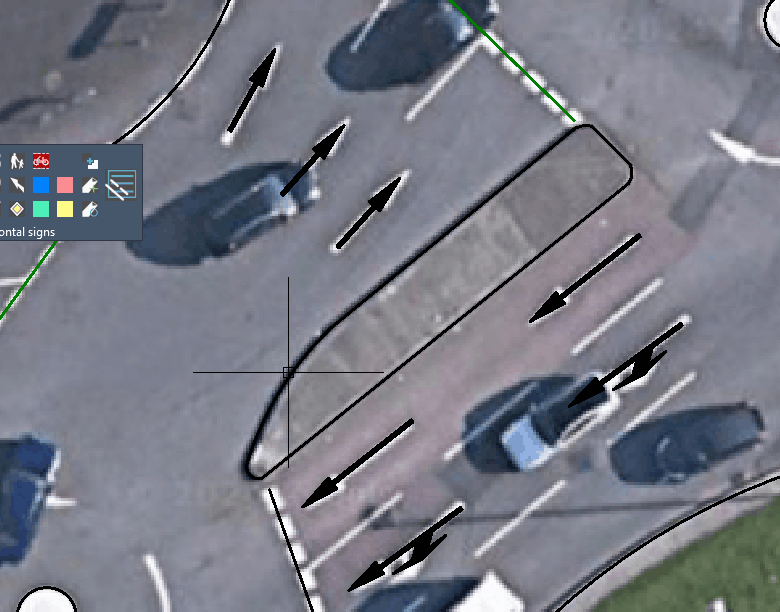
As we can see, we’ve quickly and conveniently placed the arrows. Let's create three more around the roundabout.
Here I used the tools of the CAD programme itself: I drew an arc, which I transformed into a polyline, and I added a vertex at the thickening of the arrow. In the properties panel, I gave them the correct widths to make the arrow. Then, by rotating in the centre of the circle, I added two copies, and a small roundabout was created.
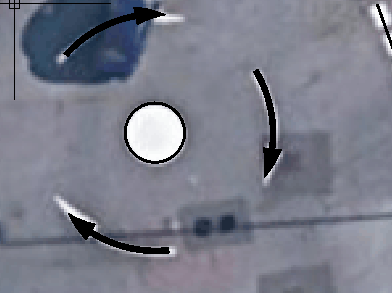
It was also possible to create an array of ready-made arrows so that they could be conveniently placed next to the other roundabouts. ZWCAD offers many solutions for each task.
Excluded surface
Let's now look at another ZWTraffic addon's function in this category, this time it’s Excluded surface. The command allows you to simply hatch selected excluded areas.
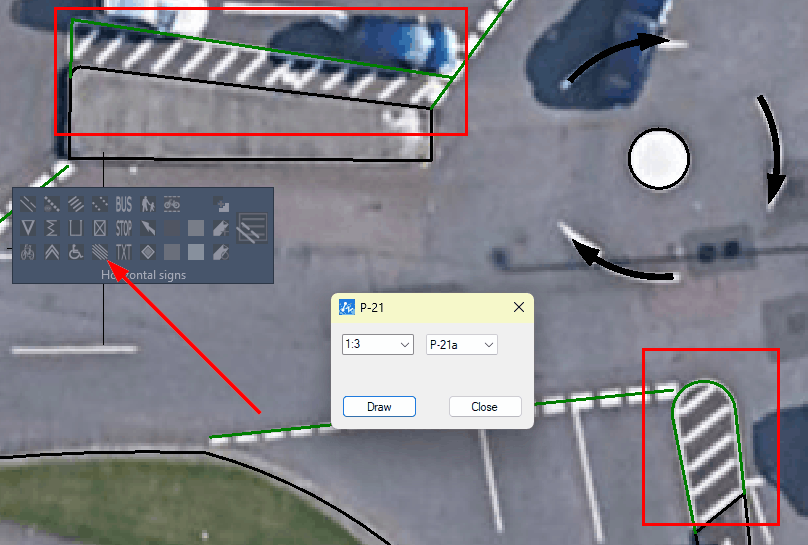
To start, select the command and scale, then click Draw. ZWCAD will ask you to indicate the area to be hatched.
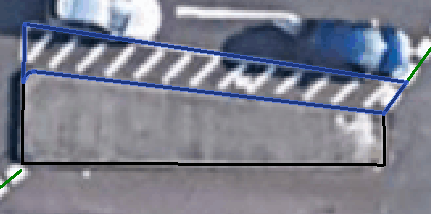
We see that the selected area is highlighted in blue. Next, the programme will ask you to indicate the direction of movement so as to select the angle inside the excluded area accordingly.
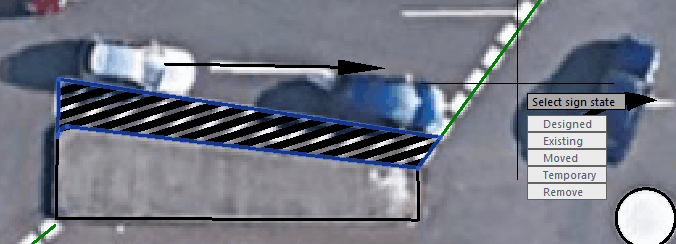
An indicator arrow will appear, and the area will be hatched. Finally, ZWTraffic will still ask for the state of the sign.
Horizontal text
Thanks to the ZWTraffic addon, our CAD programme is also extended with the possibility of placing horizontal inscriptions—both prepared and our own.
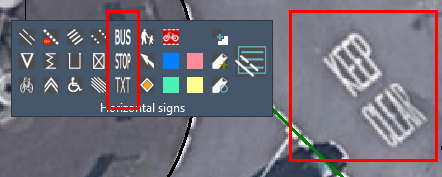
We have BUS and STOP text available, but with the help of a third function, we will place KEEP CLEAR text at the designated location.
After starting the function, ZWCAD will ask us to enter the text and its symbol, which we simply confirm with Enter. All that remains is to select the size of the sign; for me, it will be Long.

We can do the lettering in any way we like and edit it as necessary. A special font prepared for this purpose is responsible for the quality of the horizontal text.
Inserting road lines
Let’s now move on to inserting horizontal lines using the ZWTraffic addon. Our CAD programme now has two additional functions that make this possible:
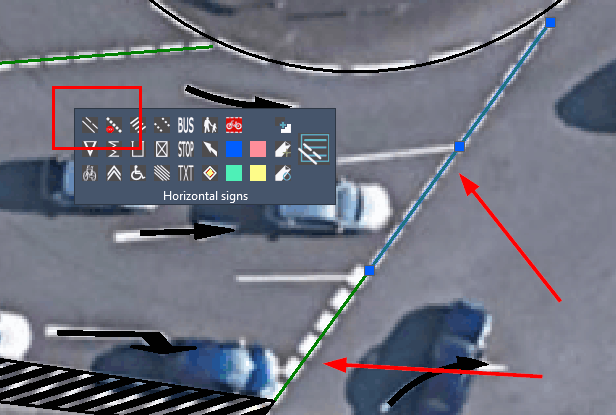
Please note that the auxiliary line is split into two separate lines, which we will convert to stop lines. This way, it will be easier for us to convert the whole thing, although we can also do it on a fragment.
The first function allows us to convert lines, and the second is to draw.
When we run it, we will be shown this menu:
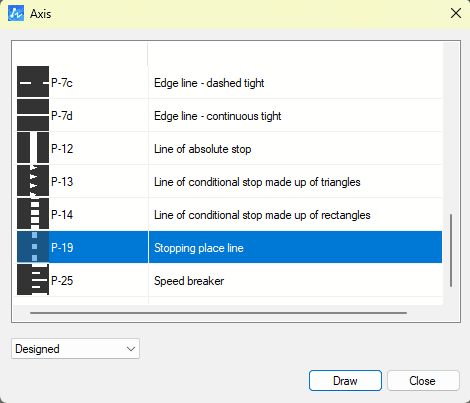
We select the type of line and its state we have chosen and click on Draw.
Depending on which function we’ve selected, the command line will tell us what to do next. Either indicate the line or the place of the beginning. In this case, I have to select the finished line and choose either its start and its end or A for All.
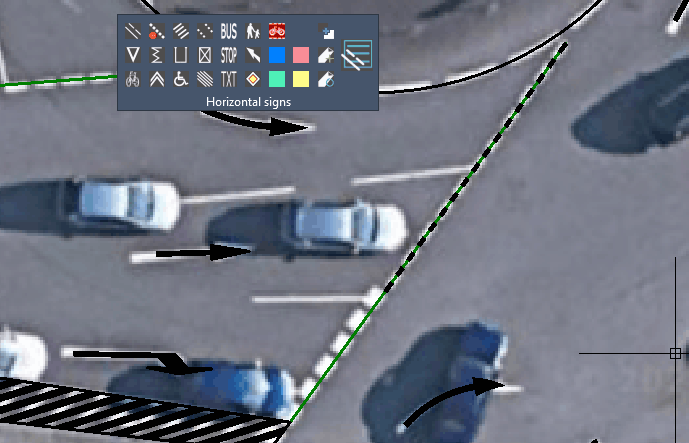
On the drawn line, the object we’ve chosen—in this case, a dashed line—will be created.
With the second command, I’ll draw a dashed line of carriageway lanes.
I ran the second command, selected the dashed line, and drew it in the right place. This produced a dashed line of roadway lanes.
It’s worth mentioning here the variable LTSCALE, which is responsible for the scale of the line, in this case the gap between the breaks.
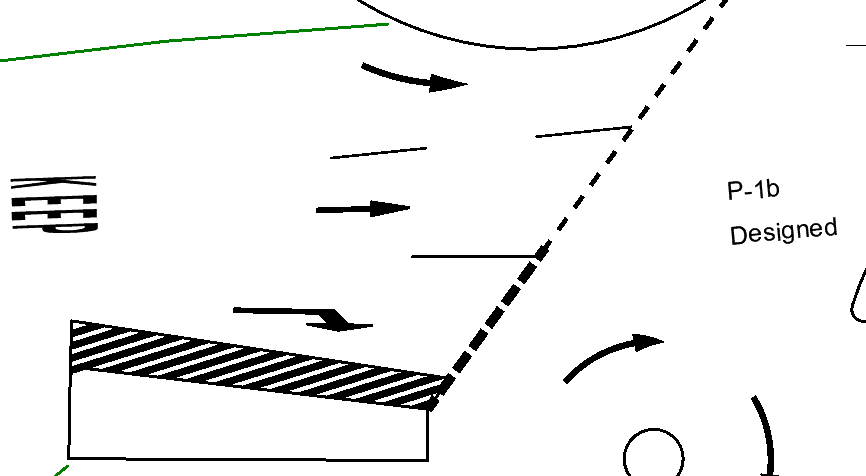
This is what the completed section of the roundabout looks like, where I also drew a thicker dashed line and removed the auxiliary lines. It was extremely easy and convenient.
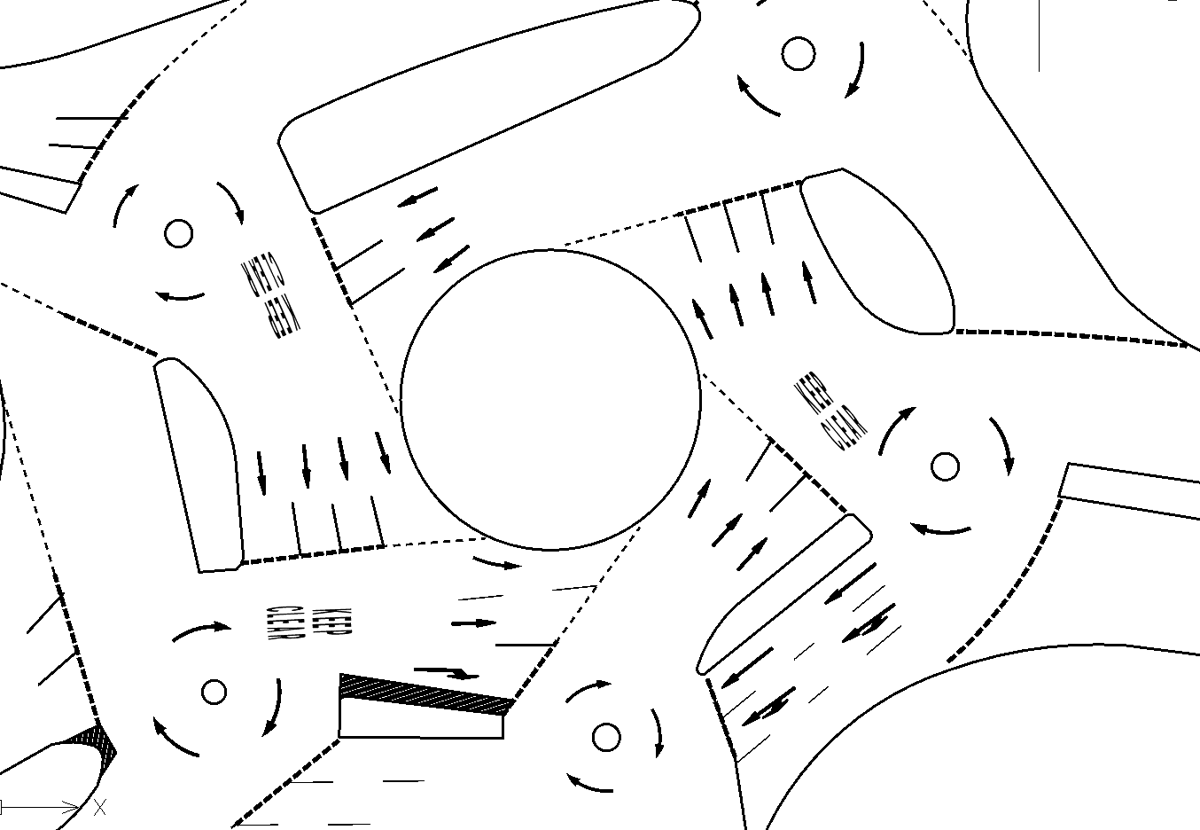
This is what our roundabout looks like after using several ZWTraffic functions. The addon offers many more tools that may prove useful and convenient, such as creating pedestrian crossings or horizontal signs. However, there is another tool on the panel that we may find useful.
Creating parking spaces
Our ZWCAD addon offers an advanced function for creating parking spaces. However, let's look at where we’ll be inserting them.
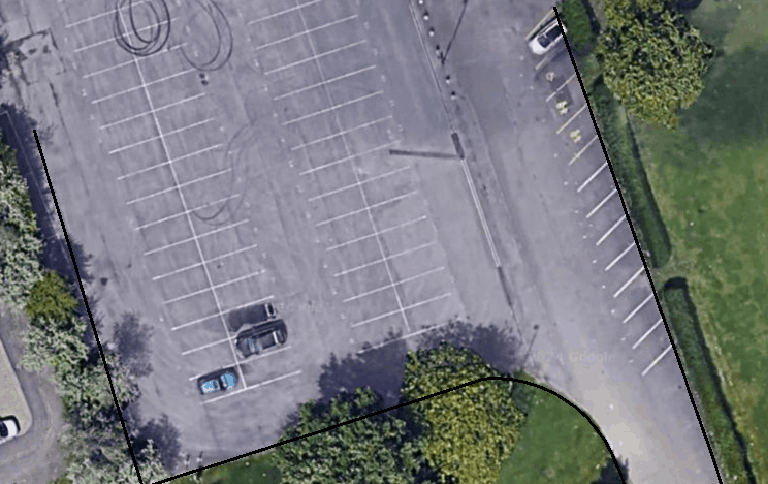
We start the Parking spots command in our CAD:
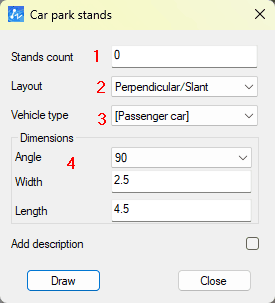
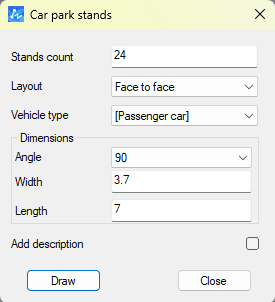
The menu offers us several useful options:
- Number of parking spaces. If we select the default value of 0, the number of spaces inserted depends on the length indicated when drawing.
- Shape of the parking spaces.
- Type of vehicle. This is responsible for the size or the markings, e.g., for disabled people.
- One of several angles can be selected, as well as custom width and length settings.
For the placement of spaces for disabled people, we’ll use this setting:
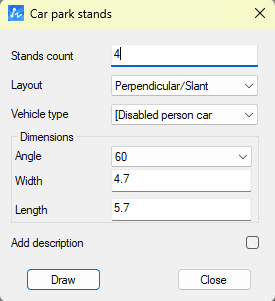
We then select the start and row, and then the side. We then place the standard spaces, in which case these settings will come in handy:
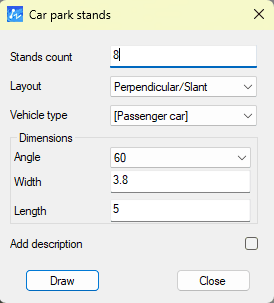
What remains is to make the main parking spaces in the middle.
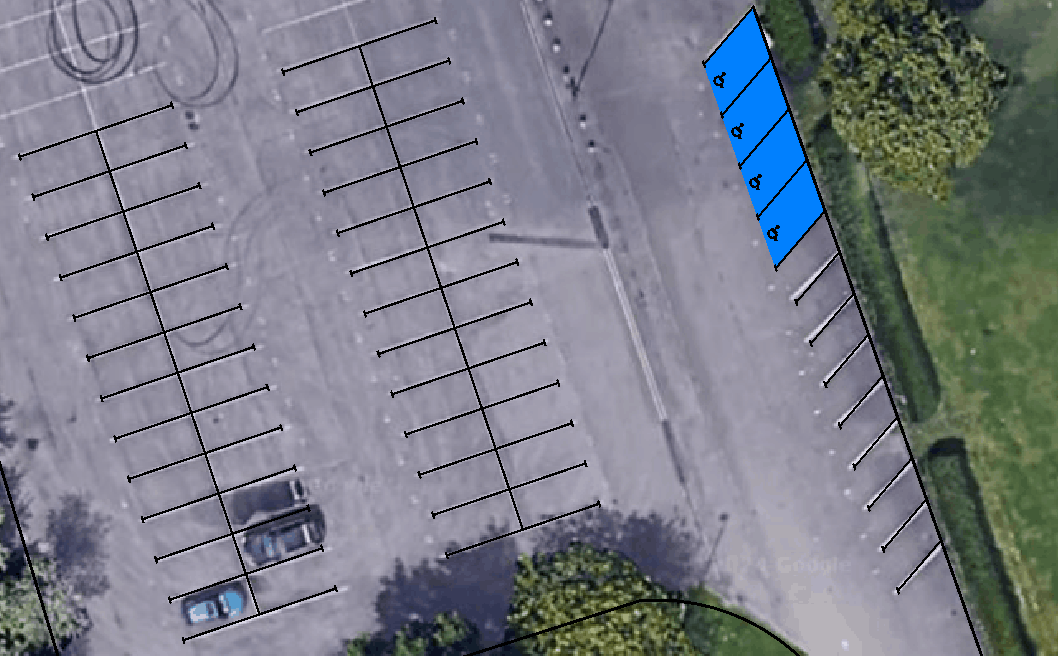
Let's look at the finished result in our CAD design:
I encourage you to test the programme yourself. ZWCAD is available to download here, and our ZWTraffic addon is here. We’ve also prepared other tutorials on the functionality of the application.

